Maygay M1 series Token-to-Cash board fitting!
(under construction! page might change slightly) Hosted on a Raspberry PI
The M1 series board HAS to be FULLY WORKING before carrying out this modification. It will NOT make a faulty board work!
I will be offering a fitting service for anyone that does not want to mess about with there boards themselves, and perhaps a M1 board repair service for faulty boards.
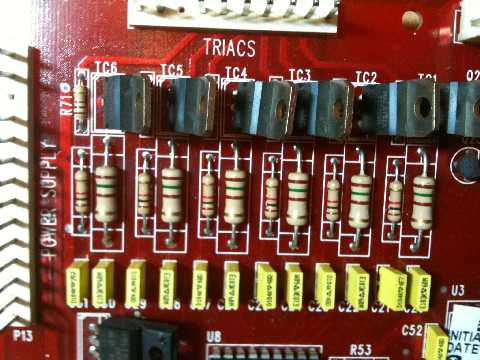
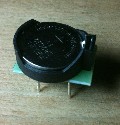
First of all locate the Triacs, they should look like this on both the M1A and M1B board as this part of the circuit is identical on both boards
(Some early M1 boards have a slightly different layout but have the same component numbers so is basically the same fitting)
Locate and remove bottom legs of R58 and R64 (150r resistors Under Triacs TC2 and TC4). This disconnects the Token payout slides from operating

I just bend them round to one side so if necessary can be fitted back at a later date should the process is needed to be reversed

Next put a wire link in between the now vacant holes left by R58 and R64
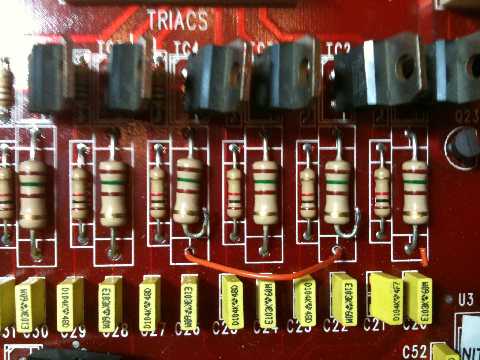
Connect this also to the token input on the Token-to-Cash board
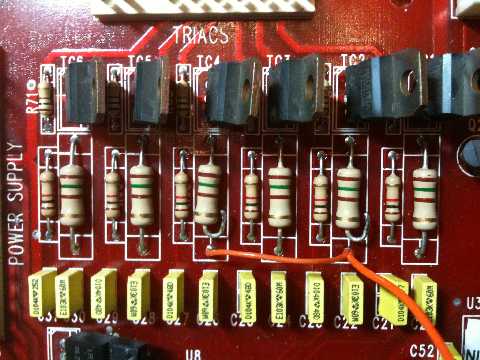
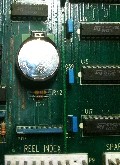
Next solder the 'Silver' output from the Token-to-Cash board to the bottom end R55 (Green wire in picture) (Associated Triac TC1)
And the 'Gold' output from the Token-to-Cash board to the bottom end of R61 (Yellow wire in the picture) (Associated Triac TC3)
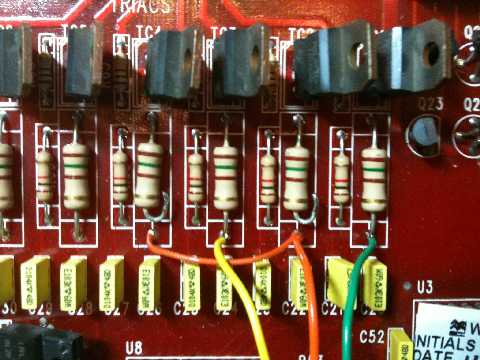
All that is then left is to connect the +5v and 0v connections to the Token-to-Cash board
There are many places to find 0v and +5v but I have found a good place nearby are the resistors R51 and R52
This is best shown in the picture below
Bottom left of resistor for +5v (R51 4k7) and middle resistor right hand side (R52 10k) for 0V

That's it your done!
Replace the board back into the machine, MAKE REALLY SURE THE ADDED TOKEN-TO-CASH BOARD CANNOT TOUCH ANYTHING AND BE SHORTED OUT!
Double check again the Token-to-Cash board cannot short out on anything at all! 2 holes are provided on the Token-to-Cash board for mounting.
A small nylon zip lock tie can be used to attach it out of harms way!
Switch the machine back on, go into test mode, select test 1.2 and when either TK button is pressed once, 20p will be paid out, press either of the TK button 5 times and it will pay out £1
JOB DONE!
Congratulate yourself the machine is now on Cash Jackpot Payout!!
If you remove all the tokens from the token tubes do remember to activate the tube level sensing switches so the motherboard thinks it has full token tubes!!
Play the fruit machine knowing it plays a better game on Token Jackpot, but will pay out Cash Jackpot on winning!!
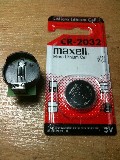
While you have the M1 board out of the machine, why not replace the NIMH battery with one of my nice new modern coincell replacements that will not damage the board by venting or leaking! preserve your board from battery damage and having to keep routinely checking every few months or so!
*****Available NOW*****
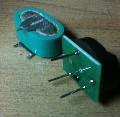
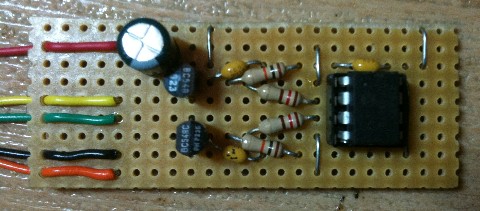
Below is the Prototype board used to test all aspects of the Token-to-Cash final design
Currently a custom PCB is being created which will make the Token-to-Cash totally universal and able to fit into most favourite fruit machine technologies.
Will also work on machines with 10p token's and/or 10p payout tubes!
It will also be able to convert Tokens-to-Cash on Barcrest MPU4 and even the earlier MPU3 with 10p and 50p payout tubes!
The software within the tiny 8 pin processor chip on the Token-to-Cash board has been totally developed, written, programmed and tested by myself, so it is 100% fit for purpose
I would be very interested to know if anyone wants this board and numbers that might be needed as I am in the process of trying to get the PCB made and ideally would like to know rough numbers for the production run so no one is disappointed.
Watch this space for more information!!!
I will try and answer all questions through Dave at Mr P's
Many thanks to Dave at Mr P's who without his support this project would NOT have even got off the ground!
Thanks Dave